

Replacing Cables
Vespa Clutch Cables - Non P Series
Vespa Gear Cables - Non P Series
Front Brake Cable
Rear Brake Cable
Speedometer Cable
Vespa Choke Cable - Non P Series
Resources
Gear/ throttle Cable Replacement
This section shows a quick step by step of replacing cables on an older type (pre P-series) scooter. The first step is to remove the headlight unit with two small screws located at about 4 and 8 o'clock when looking at the headlight. The unit can then be hinged out from the bottom and lifted to release a top pin from the headset. The bulb holder can be disconnected by undoing the two metal clasps that attach it to the headlight.
Remove the speedometer by undoing the center of three bolts when looking at the bottom of the headset. The speedo drive and speedo bulb will also have to be disconnected as you pull the speedometer clear. Once this is done you should see something similar to the picture below.
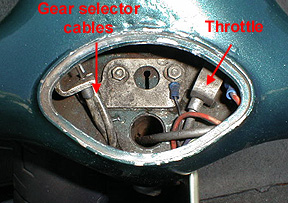
This sections shows how to
replace the inner and outer cables for the gear selector box/ throttle
slide assuming that the cables are ready for the trash.
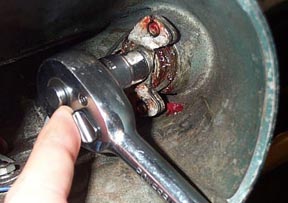
I find it is easiest to simply
remove the gear end of the twist grip to get the ends of the cables out
at the headset end. Using a 10mm socket, remove the central bolt.
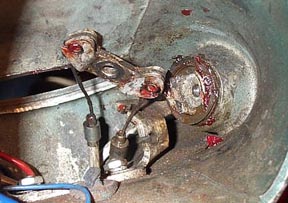
Once the pulley is removed,
save the spring washer and locating washer that remain on the twist
grip end for the rebuild. Move the cables so that the little "top hat"
ends to the outer cable disengage from their supports as shown above.
Pull the cable inner out of the outer with a pair of pliers. Once it is
out you can clip the head of the outer cable to get rid of the crimped
metal end as this could get caught as you pull it through the frame.
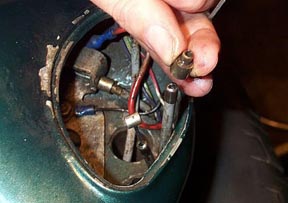
If you are just removing the
inner cable then replace the top hat over the cable outer end,
lubricate the new control cable inner with oil, and then thread the new
inner in to the existing outer cable all the way until you see it at
the selector box end.
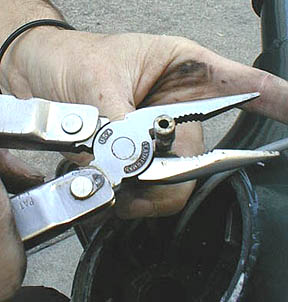
If you are also replacing the
outer cable you can clip the head of the outer cable to get rid of the
crimped metal end as this could get caught as you pull it through the
frame as shown in the next few shots.
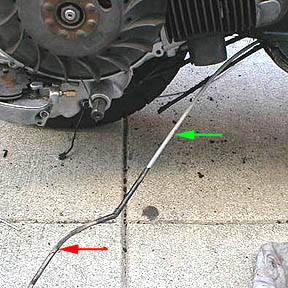
At this point a helper is
really handy. One person holds the cable at the headset straight up in
the air. At the other end you pull the cable slowly through the frame
as person number 2 feeds it in. It should slide right through and poke
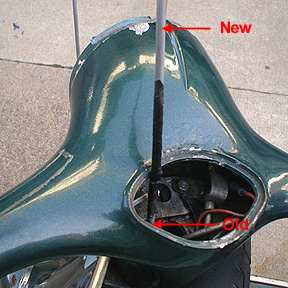
out the proper hole near the engine. The red arrow above shows the old
cable outer and the green is the new cable outer. Carefully unwrap the tape from the cables
and move on to the next step of threading the inner cable.
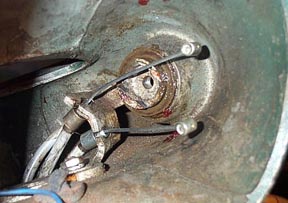
Thread both inner cables with
the cable top hats in place and set the hats in the support in the
headset. Then carefully fit the end nipples in to the pulley in the
same direction as they were removed.
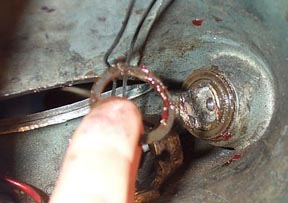
Refit the dished washer and
then the locating washer, and make sure the small hole in the pulley
engages with the peg on the locating washer.
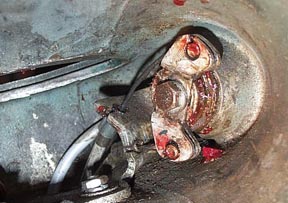
Refit the pulley and tighten
the 10mm nut. Place the twist grip in the neutral position and then
move down to the selector box end of the cables.
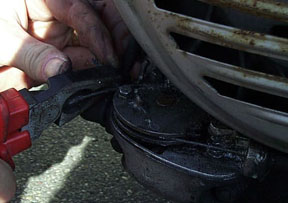
I've switched the model of the
bike in the photos but the idea is the same. At the bottom end thread
the cable inner around the selector wheel, through the nipple at the
end, and then pull it tight. When you pull it make sure the twist grip
doesn't move from the neutral position, and be sure the bike is also in
neutral at the motor end. Make sure the cable outer is weal seated in
the adjuster and that the threaded adjuster is about 1/2 way out so you
can adjust it in either direction if needed.
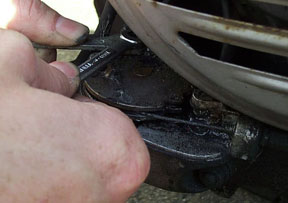
Using a 7mm wrench for the
nipple bolt and an 8mm wrench to stop the nipple from turning, tighten
the nipple down. It is helpful to have a helper still pulling on the
cable to keep it tight. Do the same thing for the other cable and then
wiggle the twist grip without actually engaging gears. There should be
about an 1/8" of movement. If there is too much movement, equally back
out both the adjusters at the selector box. If there is too little,
turn them both in enough to get the wiggle.
Note: An alternative to this method to replacing outer cables is to get an extra long control cable from a bicycle dealer (the type used on tandem bikes). Thread it through the new outer cable first so that the nipple is tight against the outer cable end. Then thread the inner in to the old outer cable still in the bike. This will get you the same result as taping the two outers together as shown above. From here, go to the selector box end and place a gear nipple on the inner cable. Now you can pull the old cable outer and the new cable outer will replace it. Once the new cable is in position, remove the nipple and the tandem inner.
