Vespa Fuel Tap
The Vespa fuel tap on early
models are easily accessible by opening the carb flap below the seat
near the fuel lever. All these instructions can be used on earlier
bikes without removing the tank. Later bikes after about 1960 or so
have a fuel tap on the bottom of the tank, which unfortunately buried
in the frame.
To remove the tap the fuel
tank must be removed from the frame. First you'll need to remove the
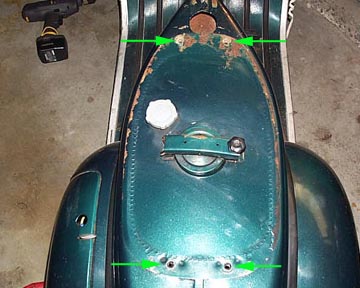
seat by removing three 11mm bolts at the hinge. Then using an 11mm
wrench/socket remove the 4 retaining bolts shown above in green. On
models with the old style metal lever, be sure the fuel tap is turned
to on (or the upright position) as this is the only way the lever will
fit through the hole in the frame.
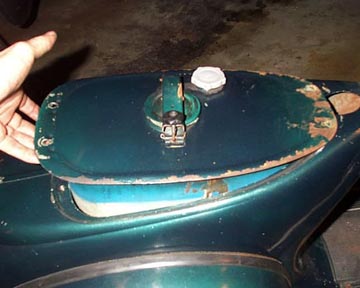
The tank is removed by lifting
up the back first until the fuel lever and oil sight glass (if fitted)
clear the frame. Then lift directly up, shut off the fuel when the tank
is clear, and disconnect the fuel line. Remove the fuel lever from the
fuel tap by removing the pin, and if an oil tank is fitted you'll need
to plug the end of the oil line with a bolt or something.
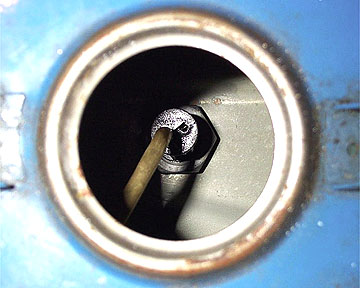
The tap is threaded and has a
large flange on the bottom of the tank and a 32mm nut on the inside
face of the tank. While this can be unscrewed with typical tools and a
lot of effort, it can be unscrewed effortlessly with the correct
tool. Fit the tool
down over the nut, hold the bottom of the fuel tap with your hand only,
and start unscrewing. Because of the breather pipe you'll only be able
to unscrew about 180 degrees at a time before taking the tool off the
nut to start again.
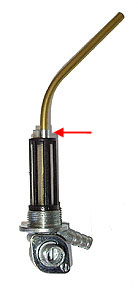 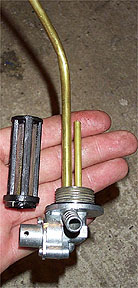
Once the tap has been removed
from the tank it can be inspected and cleaned. On later P series bikes
there is a small clip which retains the fuel filter. Once unclipped the
filter can slide up the breather tube, placed in clean gasoline, or
blasted with air until clean.
Refitting the valve is the
reverse of the disassembly, but there are a few tricks to make it less
of a headache. First, replace the small gasket that goes in between the
tank and the fuel tap. There is nothing worse than going through the
effort of replacing the entire tank, and then have gas leaking within
the frame. Second, push the tap through the fuel tap hole, and try to
get the long copper breather tube near the filler cap opening. Place
the fuel tap nut over the breather tube so that it will slide down to
the threads. The nut should have the flat side down and the slightly
beveled edge facing up.
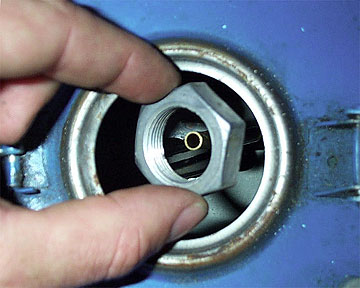
Once the nut slides all the
way down to the threads the nut can be loosely tightened. The fuel tap
on the bottom of the tank still needs to be orientated correctly. Use
the tap tool again and tighten the nut slowly as shown below
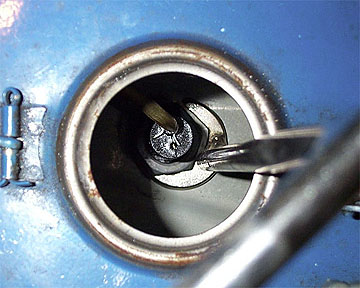
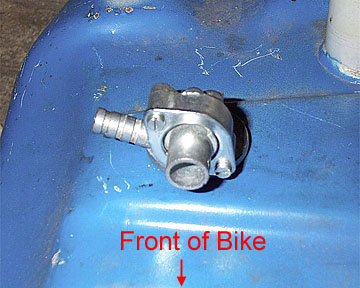
The last step is to make sure
the outside of the fuel tap is pointing the right direction. It must be
facing towards the front of the bike so that the fuel tap lever will
engage it correctly. The last step is to tighten down the nut
completely while making sure the bottom of the tap does not rotate. DO
NOT use a wrench on the tap body as it is a casting and can be very
brittle. I always put gas in the tank above the reserve level and let
the tank sit overnight just to be sure there are no leaks.
|


