 |
 |
 |
 |
 |
 |
 |
||||||||||||||||||||||
Vespa KitsSmall Frame: Large Frame: Malossi 210 Installations: |
Vespa P200/PX200 - Malossi 210 |
|||||||||||||||||||||||||||
| Timing | 18 degrees BTDC |
| Bore | 68.5mm |
| Stoke | 57mm (standard) |
| Compression | 10.5:1 |
| Capacity | 210cc |
| Main Jet | 130 (SI 24/24)* |
* We ended up using a 126 main jet.
We ordered the kit from Scooterworks as they had a really decent price. The kit is a cast aluminum barrel with a Nicasil lining and weighs less than 1/4 of the original barrel. Aluminum has a much better heat transfer rate than cast iron so this barrel should be able to dissipate more heat than standard.
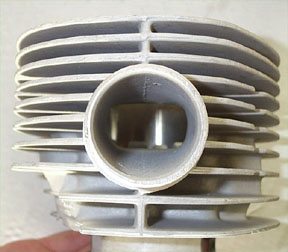
The kit comes with:
- The barrel
- Piston, rings, wrist (gudgeon) pin, and circlips
- A 130 main jet
- A metal base gasket
- Some funky stickers
As with many kits it does not come with a head. A standard head needs to be milled and re-profilled to suit this new kit. See the parts page for an idea of what one looks like.
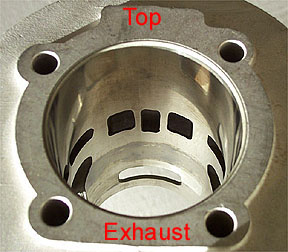
The most obvious thing about the kit is it is all ports! There is barely a 1/4" of the circumference at bottom dead center that is not open to the transfers or the exhaust. Seven ports total vs. the 3 standard ports in a Vespa barrel. The piston rings are pinned either side above the main transfers. Below is a shot of the transfers from the head.
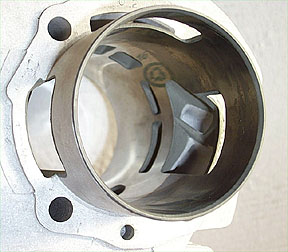
The bottom of the barrel is equally as different as the port layout. The three transfers are larger than standard and take place both in the crankcase and the barrel. The photos below show the large main crankcase transfers which split into two smaller ports in the further up the barrel bore.
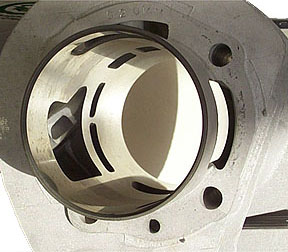
And another shot from the other side.
The instructions for the kit turned out to be half in english and half in italian but we did our best to understand them. There are many other parts of the engine that need to be changed or revised to make this kit work at its best. They range from cutting the crank web intake opening so that it remains open for a longer "gulp" of air/gasoline, opening out the carb intake in the left hand engine casing, fitting a larger carburetor, and fitting an after market exhaust. This bike is still going to be a daily rider so we are planning to leave the existing carburetor and oil metering device in place, but change the exhaust and open up the casing transfers to match the barrel. The crank will be left as Piaggio intended.
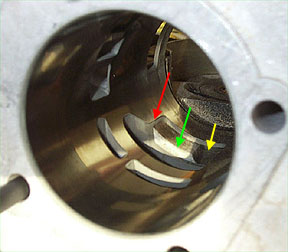
We fitted an old flywheel side casing to the barrel to see what is required to match the casings to the barrel transfers. The existing side transfer (which is not used on a P200) must be enlarged to match the barrel to get best gas flow to the combustion chamber. In the picture below the red arrow is the edge of the barrel transfer, the green is the existing casing, and the yellow is the existing casing transfer. Once we locate a new set of casings to mess with I'll update the page with the results.
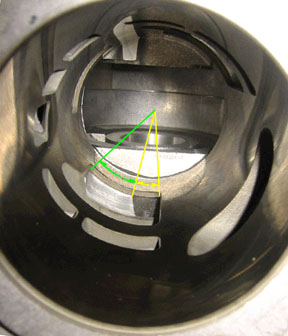
Updated - Below is a shot of the transfers now lining up after the cases were ported. The yellow represents the original transfer, and the green represents the area that was blended with the barrel transfer to allow the gasoline to pass more freely. Compare it to the above shot to see the difference.
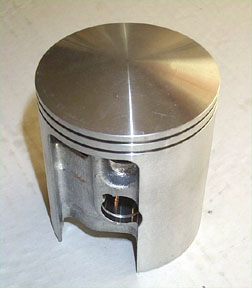
The final major difference between the standard top end and the Malossi 210 top end is the piston. The Malossi piston shown below has huge cut outs for the main transfers and smaller windows for the top transfer. The rings are also thinner and slightly beveled.
As we proceed with this conversion I'll post how to pages on the installation.