The way the spider stays where
it should when you are driving is by a single spring and two ball
bearings on either end. The spring runs through the hole in the axle
you marked earlier and the ball bearings are forced into notches on the
spider legs. As you change gear, the spider starts to move, the ball
bearings are forced against the spring, and then they pop back out into
the next notch in the spider leg. The bottom side of the spider has two
legs that are bevelled unlike the others. These are to aid installing
it over the bearings which are trying to move out.
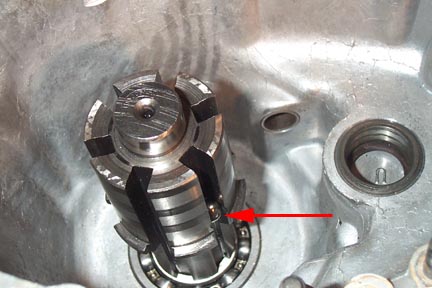
To fit the spider you first
need to set the spring into the axle hole, and the two ball bearings on
either end. Use a little grease if necessary to hold them in place.
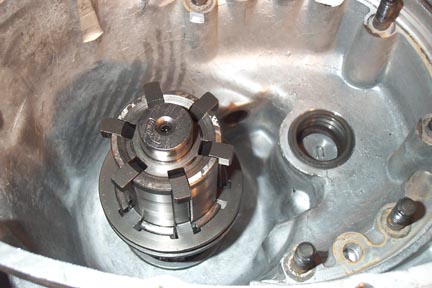
Place the spider on the shaft
making sure the bevelled leg ends are in the same grooves as the ball
bearings. Then push down hard and it should compress the ball bearing
spring and drop firmly in to place. I always leave the spider in the
first gear position for reasons that are clear later on if you have an
all in one external actuating arm. This means that the spider legs are
flush with the thick part of the axle as shown above.
The selector arm can now be
loosely fitted to the spider. It has two small rotating blocks on the
end, which slide into the groove in the spider. Make sure the arm is
installed so that the single bolt hole has the threads towards the rear
hub.
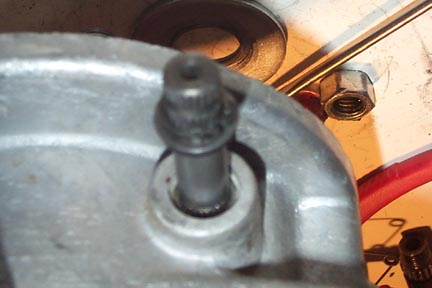
On the outside of the casing
above the rear wheel, slide the gear selector splined shaft into the
casing. With one hand inside, make sure the shaft goes into the
selector arm hole. Depending on your model, the selector arm may be a
single piece but the one on this casing is a two piece unit. If it is a
one piece unit you should probably fit the rear hub to make sure the
gear selector arm doesn't hit the rear hub rim when the bike is in
first gear. If it is a two piece like the one shown above, the arm will
be adjustable and you can fit it so it doesn't hit the rear wheel
before you complete the rebuild.
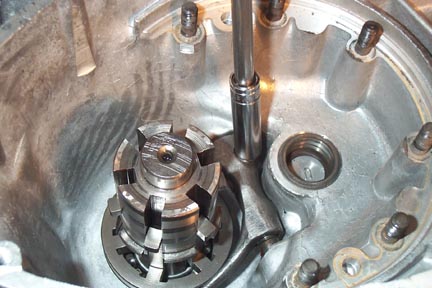
Once you are happy with the
placement of the gear arm on the outside of the case, fit the single
selector arm bolt and tighten it down with a socket. I move the spider
through the gears at this time to make sure each one selects properly.
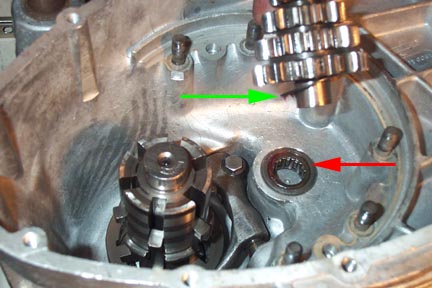
The small roller bearing (red
arrow) can now be fit into the casing followed by a small gear cluster
shim (green arrow) and the gear cluster itself. There is a special tool
to remove the metal outer which is a press fit into the casing, but
unless the play between the new roller bearing and the outer is
obviously suspect, it is easier to leave it in place. I also found a
difference between my new Indian casings which came with this piece
installed, and my old Li125 Special casings. The new casings had a
small lip which set the gear cluster further off the casings. I was
worried this would misalign the free gears and the gear cluster but it
ended up not being a problem. After asking a few questions I found that
once the clutch is installed the gear cluster shaft is pulled tight to
the gearbox end plate anyway, and doesn't really ride against this lip
- the bearing is just there to locate it and spin.
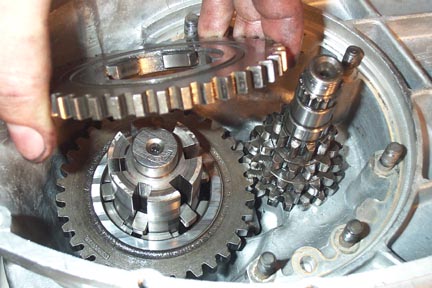
Now start adding the free
gears in the same direction you took them off. Make sure each gear
interfaces well with the gear cluster. You may have to rotate them
slightly to drop down over the shifting spider.
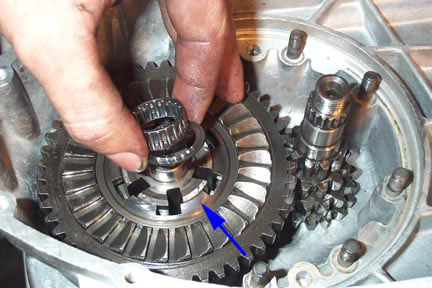
Fit first gear with the kick
starting ring facing you. This is followed by a new axle bearing shim,
and the new roller bearing at the end of the shaft. Once these are all
installed, fit the single large gearbox shim which fits in the groove
at the inside of the first gear piece (not shown installed, but it goes
where the blue arrow notes). This shim may need to be replaced later
with a thicker one, but unfortunately the only way to tell is to build
the gearbox and then measure the tolerance.
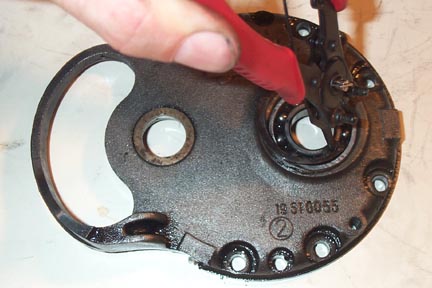
The gearbox backplate has a
pressed fit ball bearing which supports the end of the gear cluster.
Have a look at your bearing and see if it worth it to you to replace
it. Since I was building a non-stock motor I replaced mine to be safe.
To replace the bearing, remove the retaining circlip and bang the
bearing out from the other side with a suitable sized socket. To
install the new one, flip the backplate over and bang the new one in
until it is flush with the inside lip. Refit the circlip and the back
plate is ready to install.
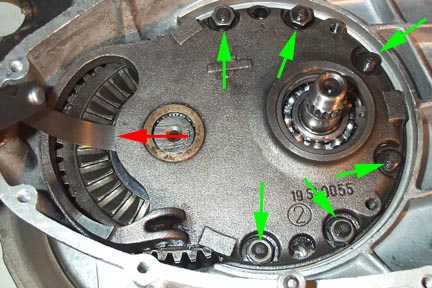
Before fitting the backplate
make sure you have remembered the small roller bearing at the end of
the rear axle shaft, and the important gearbox shim. Then carefully
lower the backplate into position and push it down until you can see
enough thread on the six casing studs (green arrows) to get the nuts
started. Fit lock washers to each stud and then add the nut. Start
tightening the nuts one at a time and only about a turn at a time. You
are trying to set the backplate down so that the backplate bearing is
forced onto the gear cluster in a level manner. As you tighten the nuts
check to make sure the backplate is moving equally down on each side
and that it is not racking in one direction or another.
Once it is fully down, tighten
all the nuts and either fit the rear hub and tighten it fully down, or
fit a small spacer tube instead of the rear hub and also tighten it
down. This is required because it makes sure the rear axle is
absolutely tight against the bearing, so you can get an accurate
reading of the shim tolerance noted below. Now get a set of feeler
gauges to measure the tolerance between the backplate rim and the
gearbox shim. Be sure you are getting the feeler gauge right in against
the backplate rim where the red arrow is shown above. Anywhere between
0.30 and 0.07mm is within tolerance. If it is beyond this range you
will have to remove the backplate and fit a thicker shim. Unfortunately
the only way to measure the tolerance is with the backplate totally
torqued down, so this may be a frustrating process. I usually have a
couple of difference thickness shims on hand (these can be ordered from
your scooter shop), and once I make the first measurement, a little
math can work out the one you need.