Vespa1960 VBB 150 |
10" Front Wheel ConversionThis Vespa originally had 8" wheels which have smaller brakes and handle a little worse than 10" type wheels that were fitted to the higher range large frames of the times. I was changing out the engine to a P200E engine which comes with a 10" wheel so I thought it would be best to also change out the front wheel to match. These photos are not from the actual restoration of this bike, but from the same bike after about 5 years of wear and tear when I needed to change the fork bearings. Parts you'll need if you already have a working 8" set up.
Companies like Scooterworks are now selling Bajaj made 10" forks online which makes it easier to get the parts for this conversion. To make the basic conversion you will have to remove the existing 8" forks from the bike. Click here for a page that explains how to remove them. Once you have the old forks out of the bike, be careful to keep all the loose bearings for installation of the new forks. The mudguard will also need to be removed which is a little tricky. I will post picture of how to do this the next time I need to do it to one of my bikes. The basic idea is that you heat up the ball bearing race and tap at the bottom of the dust cover with a flathead screwdriver and hammer to force the bearing race off the forks. Be sure to tap evenely from each side so it comes off squarely. Sometimes the dust cover is destroyed when doing this but they are very cheap from any scooter shop. Once the bearing race is out of the way, remove the three 11mm bolts at the top of the mudguard and the one or two (depending on the model) in the side of the mudguard. I used GS150 forks in my VBB bike because they were the best 10" forks I could find at the time. Some forks like the GS150 have different fork stops to stop the forks turning more than 45 degrees in ecah direction. A qucik dry fit of your forks in the frame will let you know if these will have to be reworked. The 8" mudguard should fit over the 10" forks, although the side bolts through the fender may not align with the fork holes depending on the model. GS150 forks and the VBB fender did not align so we added a steel flat bar to the forks by welding it in place, and drilled the new holes where necessary. Tighten all the bolts that hold the mudguard against the forks and use nylock nuts or split washers to hold them in place
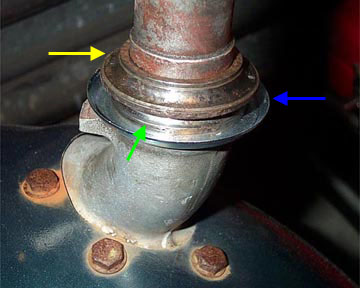
The old bearing race from the original forks now needs to be placed on the new 10" forks. The distance between the frame and fender on these forks is a little different, and if you use the 8" fork race alone, the mudguard will rub on the frame. To space it up slightly, I install a P200 race first (green arrow), and then follow it down with the original 8" fork race (yellow arrow). The P200 race will have to be tapped down until it is flush with the dust cover (blue arrow). This set up has worked in my bike for over 5 years and never shudders under braking. It also makes the top threaded section of the fork tube align well at the fork tube head.
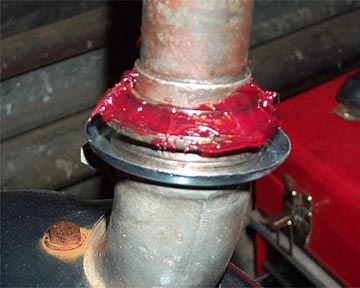
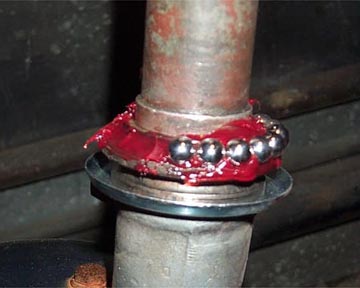
The only problem with using the existing 8" race is that some have free bearings which can be a pain to install. To make things easier, grease up the bearing race to stick the ball bearings in place. Use as much grease as you like as it will all be pushed out when the forks are installed.
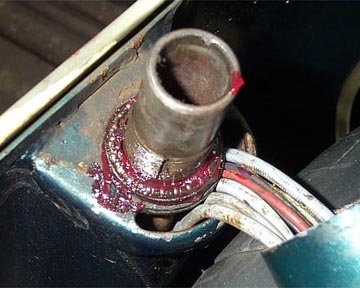
Fit the ball bearings one at a time. Many older 8" large frames take 22 ball bearings in this race. Once they are all in position carefully raise the forks up into the frame. Once the head of the fork tube sticks out of the frame, turn the locking nut on a couple of turns to stop it dropping out. Now you can carefully ease the forks into the lower bearing race and tighten the upper fork nut by hand to hold it there. Once they are in, take the bike off whatever you used to hold the frame up high of the ground. Sit on the bike and get the upper fork tube bearing and some grease ready to go. With your weight on the bike the lower steering bearings will be nicely in place.
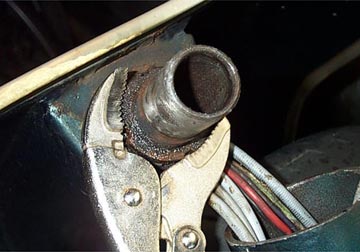
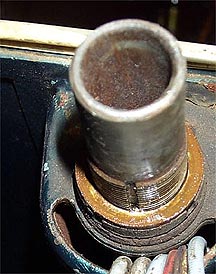
Remove the and tight upper steering fork nut and grease up the caged upper bearing race to install it in the channel. Tighten the lower race nut by hand (the one with a groove in the bottom surface) and then tighten it with the special tool, a set of vise-grips, or a hammer and screw driver.
Put the bike back on to its stand and make sure the steering feels free, yet solid by turning the mudguard from side to side. If it is too tight it will make the bike weave when moving - if it is too loose the forks will shudder under braking.
Fit the lock washer and make sure the tab is in the groove. Refit the final nut and tighten down with the same method used before on the lower nut. Finally, refit the headset by flipping it over and installing and tightening the main pinch bolt. Be sure to use a lock nut on the pinch bolt as you don't want it to ever get loose. Align the headset and the mudguard by looking down from above before the pinch bolt is tightened all the way. Next Section -->
|
||||||||||||||||||
